
Setting up analytics with Posthog
- Updated on
In this tutorial, we will walk you through the process of setting up analytics with Posthog in your Next.js / Shipixen app.
Overview of the process
- Install Posthog
- Create a Provider
- Create a PageView component
- Add the Provider & PageView components to your layout
Step 1: Install Posthog
Start by installing the Posthog package in your Next.js / Shipixen app.
npm install posthog-js
Step 2: Create a Provider
The provider initializes the Posthog client and sets up the tracking.
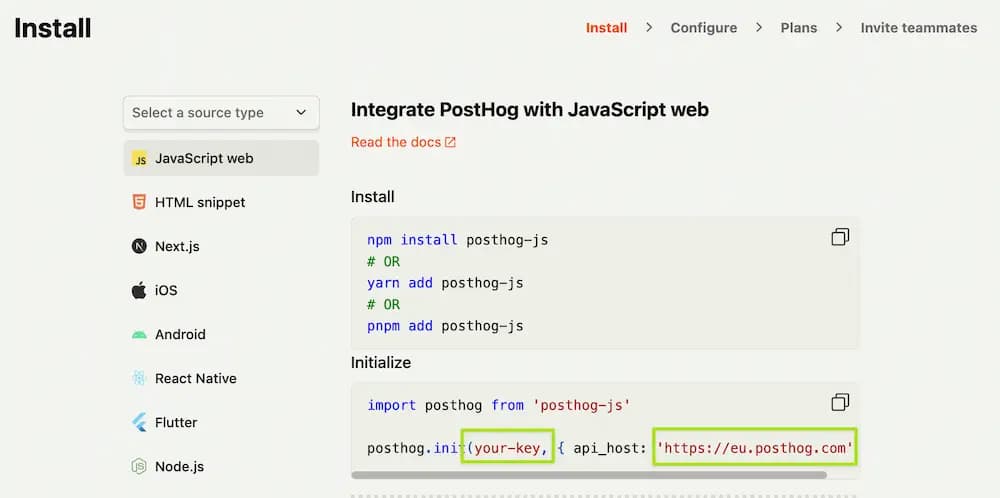
For this set, please make sure to got to posthog and open install instructions for your project.
In the instructions, you should see an API key as well as your host URL.
Create a new file called providers.tsx in the app directory and add the following code:
'use client';
import posthog from 'posthog-js';
import { PostHogProvider } from 'posthog-js/react';

const POSTHOG_KEY = 'your-key'
const POSTHOG_HOST = 'https://eu.posthog.com'

if (typeof window !== 'undefined') {
  posthog.init(POSTHOG_KEY!, {
    api_host: POSTHOG_HOST,
    capture_pageleave: true,
    capture_pageview: false, // Disable automatic pageview capture, as we capture manually
  });
}

export function PHProvider({ children }: { children: React.ReactNode }) {
  return <PostHogProvider client={posthog}>{children}</PostHogProvider>;
}
Note: you likely only want this to run in production, so you can add a check for process.env.NODE_ENV === 'production' to only run this in production.
Note2: you can store Posthog key and host in environment variables and use them in the provider; NEXT_PUBLIC_POSTHOG_KEY and NEXT_PUBLIC_POSTHOG_HOST. This would allow you to use different keys for different environments in Vercel settings.
Step 3: Create a Pageview component
To correctly track page views, including those that happen on the client, we need to create a component that will track them for us.
Create a new file called posthog-page-view.tsx in the app directory and add the following code:
'use client';

import { usePathname, useSearchParams } from 'next/navigation';
import { useEffect } from 'react';
import { usePostHog } from 'posthog-js/react';

export default function PostHogPageView() {
  const pathname = usePathname();
  const searchParams = useSearchParams();
  const posthog = usePostHog();

  // Track pageviews
  useEffect(() => {
    if (pathname && posthog) {
      let url = window.origin + pathname;
      if (searchParams?.toString()) {
        url = url + `?${searchParams?.toString()}`;
      }
      posthog.capture('$pageview', {
        $current_url: url,
      });
    }
  }, [pathname, searchParams, posthog]);

  return null;
}
Step 4: Add the Provider & PageView components to your layout
Now that we have the provider and pageview components, we can add them to our layout and bring it all together.
In your layout file, make the following changes:
+import { PHProvider } from '@/app/providers';
+import PostHogPageView from '@/app/posthog-page-view';
+import { Suspense } from 'react';

{/* ... */}

<body className="flex flex-col bg-white text-black antialiased dark:bg-gray-950 dark:text-white min-h-screen">
  <ThemeProviders>
    <AnalyticsWrapper />

    <div className="w-full flex flex-col justify-between items-center font-sans">
+     <PHProvider>
        <SearchProvider>
          <Header />
          <main className="w-full flex flex-col items-center mb-auto">
            {children}
          </main>
        </SearchProvider>
+
+       <Suspense>
+         <PostHogPageView />
+        </Suspense>
+     </PHProvider>
    </div>

    <Footer />
  </ThemeProviders>
</body>

{/* ... */}
Now, either deploy or run your app locally and navigate around. Posthog should receive events and notify you that setup is complete! 🎉